


Marika's Gluten Free Caramel Slice
Caramel slice is having her moment and I'm proud of her!

If you’ve been following the caramel slice saga in Australia lately, you’ll know she’s having a moment. And honestly? Good for her. She’s a 90s icon, and it was about time she made a comeback.
Naturally as a result I have been craving it for weeks and all of a sudden have noticed it in the cabinet of every cafe screaming out to me. However they are never gluten free… So here we are!
Before we dive in, full disclosure: this is my recipe but I’ve taken inspiration from the caramel slice queen herself, Nagi (the OG 🙌). I’ve been making caramel slice for over 10 years it was actually one of the first things I adapted to be gluten free because I had a feeling it would work. And it did.
This version though? She’s had a glow-up. I borrowed Nagi’s genius brown sugar swap and took a few liberties of my own. In particular my recipe uses *double* the condensed milk because I strongly believe in a thick caramel to base ratio, plus you’ll see some other tweaks to make it gluten free.
Also, yes: I use salted butter in baking. I know it’s controversial, but salty-sweet just works, and I’m not backing down on that.
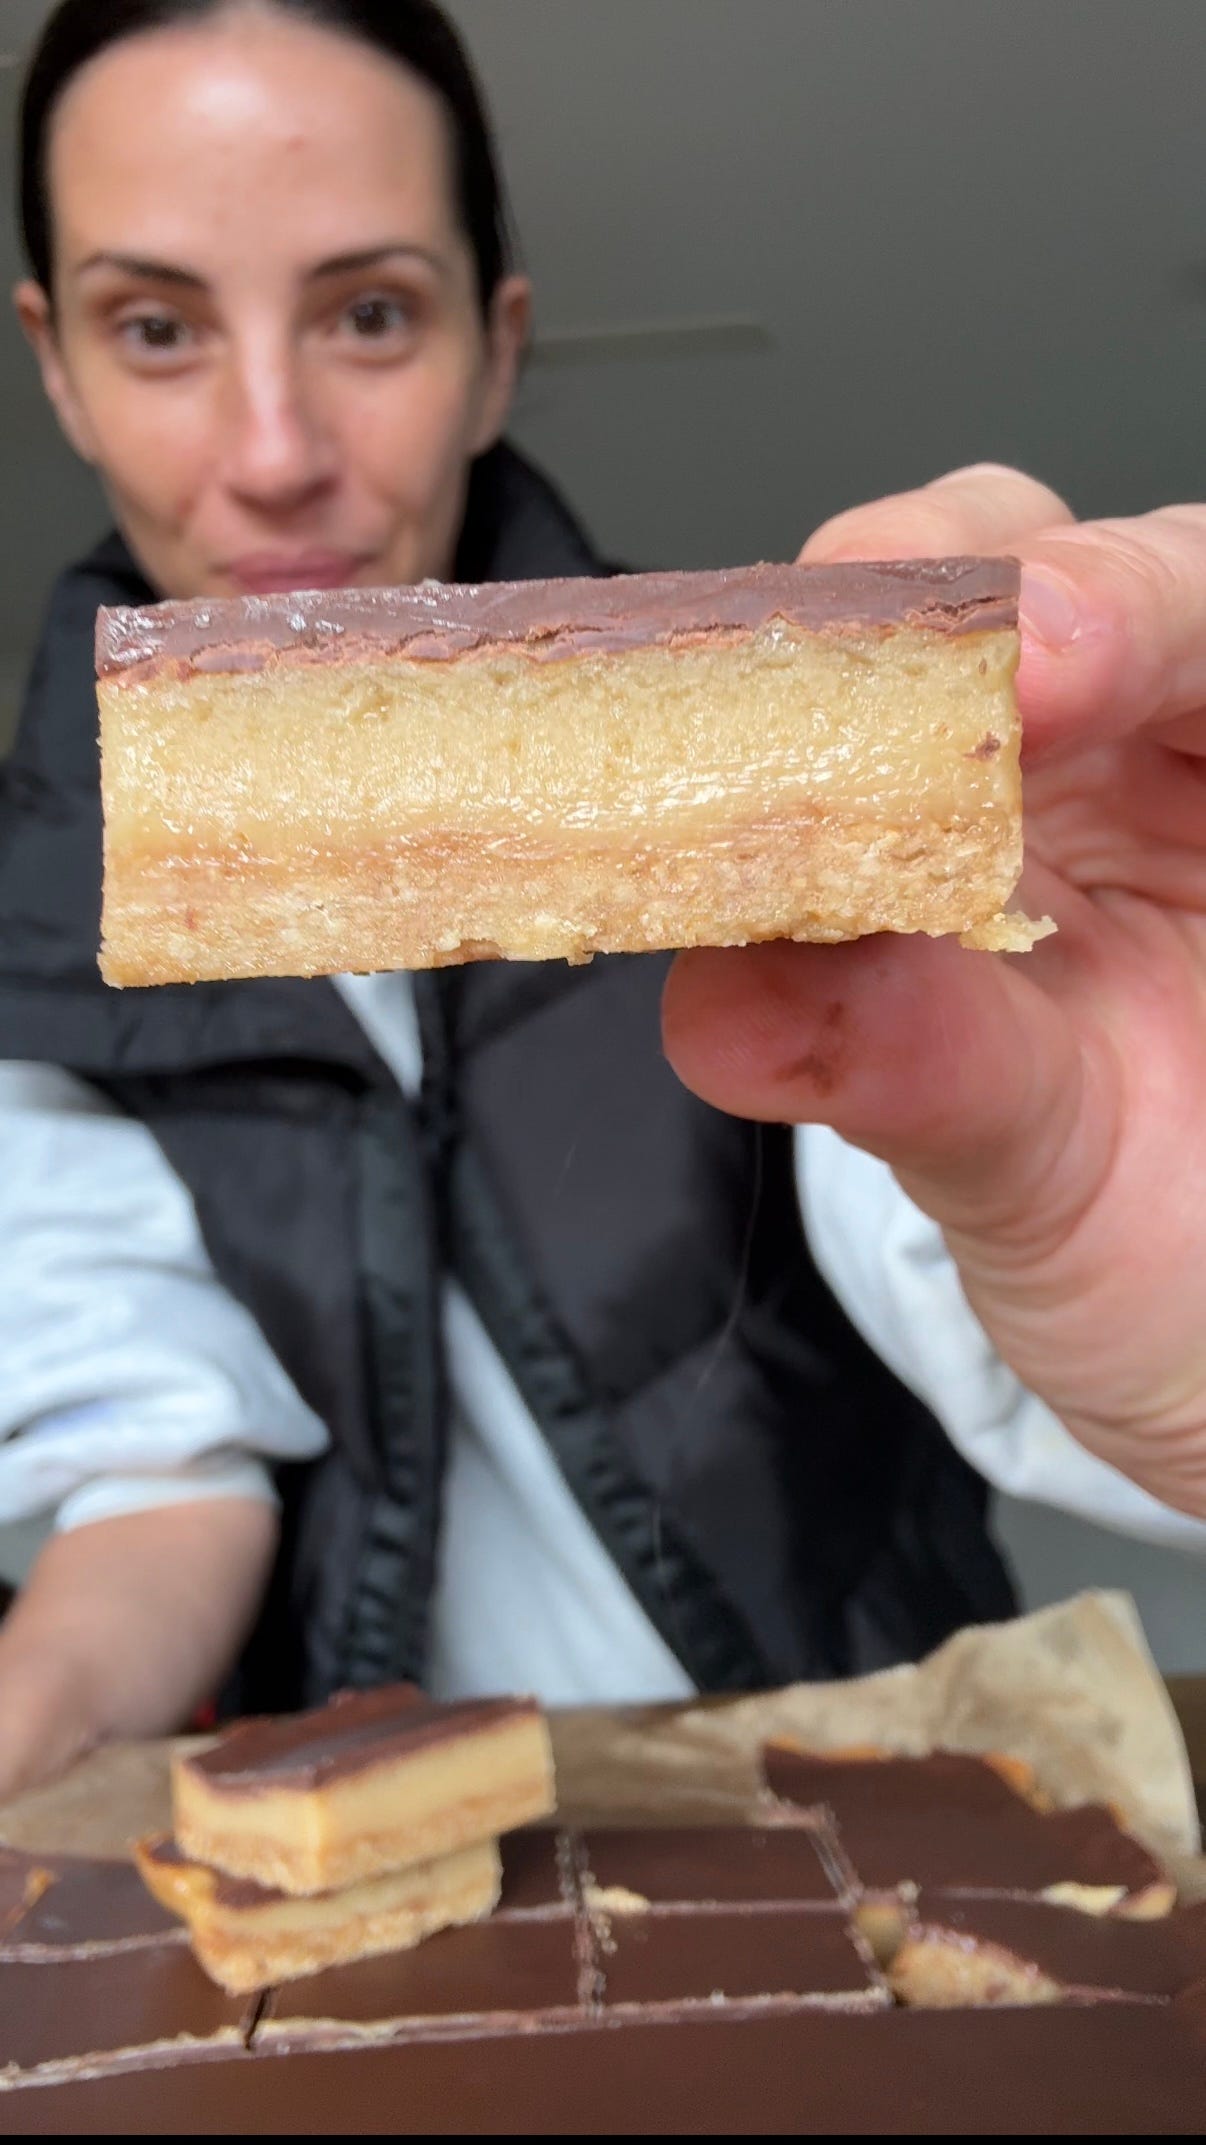
I suggest making this in a lamington tin, however I didn’t have one, only a small baking tray so the photographs don’t truly represent the ratios you would get if it were in the proper tin.


Marika’s Caramel Slice
Ingredients:
Base:
1 cup almond meal
1/4 cup desiccated coconut
1/3 cup plain GF flour (I used Woolworths brand)
1/2 cup brown sugar
100g salted butter, melted
Caramel:
2 x 395g tins sweetened condensed milk (do not use skim)
1/2 cup brown sugar
1 tsp vanilla extract
125g salted butter
Choc Top:
225g dark chocolate melts
1 tbsp rice bran oil (or any neutral oil)
Method
Preheat the oven to 180C and line a lamington tin with baking paper allowing for overhang to lift the slice out later.
Make the base: In a bowl, mix almond meal, flour, coconut, and brown sugar. Add melted butter and stir until the mix resembles wet sand.
Press the base mixture firmly into your tin using the back of a spoon. Bake for 15 minutes or until just golden. Remove from the oven and reduce the oven temp to 160°C. Let the base cool slightly while you make the caramel.
For the caramel, add butter and brown sugar to a saucepan over medium heat. Stir until butter melts and the sugar is fully dissolved. Add the condensed milk and vanilla. Stir frequently for about 15 minutes, or until the caramel thickens and darkens slightly.
Pour the caramel over the base and using a spatula spread evenly. Return to the oven and bake for 15 minutes. The caramel should be darker in colour and have large bubbles forming over it. (See pic)
Allow to cool at room temperature for 30 mins then transfer to the fridge to cool for 30-45 mins.
Melt the chocolate with the oil in a heatproof bowl over a double boiler or in 20 second increments in the microwave. Be sure not to over heat it, take it out at regular intervals and stir to see if the residual heat will melt any remaining solid bits of chocolate.
Pour the chocolate over the caramel and tilt the pan to spread the chocolate into all the corners. You can use a palate knife or spatula to spread the chocolate however you won’t get that nice smooth glossy finish.
Return to the fridge for another 2 hours or until completely cooled before slicing.
She’s classic, she’s decadent, and now she’s gluten free. I hope you enjoy this 90’s revival as much as I have, and don’t forget to tag me on instagram so I can see your creations, or simply comment here and let me know how you go!!
Marika x
Looks soo amazing 😍